
Table of Contents
Bathroom Renovation Planning Guide | Step-by-Step Architectural Playbook
Renovating a bathroom is one of the most transformative home improvement projects you can undertake. It bridges the gap between daily functional necessity and personal wellness. However, without a structured Bathroom Renovation Planning Guide, what should be an exciting home upgrade can easily devolve into a stressful ordeal marked by budget overruns, delayed timelines, hidden structural leaks, and poor spatial ergonomics.
A successful bathroom makeover requires far more than picking out attractive wall tiles and trendy brassware. It demands an integrated architectural and civil engineering framework: auditing concealed infrastructure, re-engineering plumbing distribution lines, executing multi-layer chemical waterproofing, specifying moisture-resistant materials, and adhering to a strict execution sequence.
Whether you are remodeling a compact apartment washroom, converting a legacy 30-year-old independent home bathroom, or designing an expansive master spa suite, this master guide provides the definitive blueprint for planning and executing a flawless, leak-proof bathroom renovation.
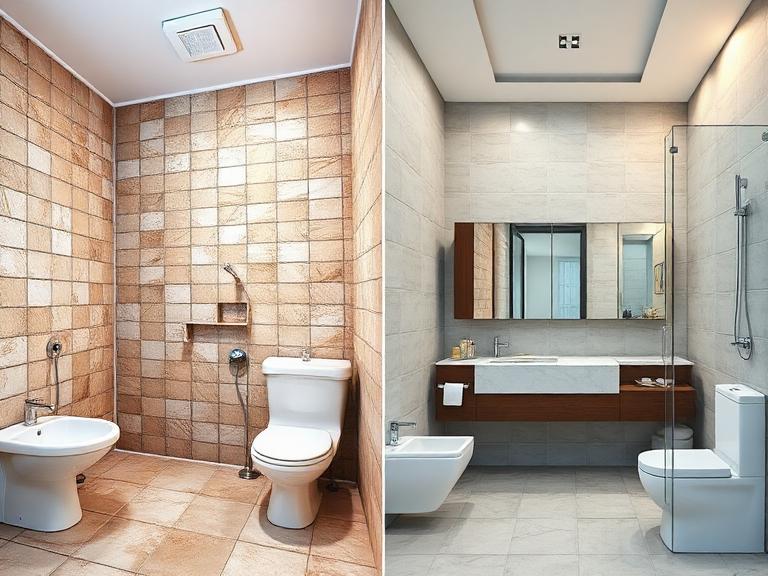
1. The Pre-Planning Phase: Site Audits & Diagnostics
Before consulting an interior designer or buying fixtures, you must conduct a rigorous physical audit of the existing bathroom footprint. Skipping this diagnostic step often leads to costly surprises once civil demolition begins.
                          [ PRE-PLANNING SITE AUDIT ]
                                       │
         ┌─────────────────────────────┼─────────────────────────────┐
         ▼                             ▼                             ▼
[ CONCEALED PLUMBING ]       [ SUBFLOOR INTEGRITY ]        [ MEP & VENTILATION ]
  • Check for legacy GI lines  • Test for active dampness    • Audit electrical breaker load
  • Test inlet water bar pressure • Inspect concrete slab drops • Map exhaust CFM airflow
  • Measure TDS & pH levels    • Check main drain stack slopes• Check geyser/heater conduits
A. Plumbing Infrastructure Inspection
- Pipe Material Check: Determine whether concealed supply lines are Galvanized Iron (GI), standard PVC, or modern CPVC/PEX. Legacy GI pipes over 15 years old must be fully replaced due to internal rust scaling and pinhole leak risks.
- Pressure Testing: Measure incoming static water pressure using a pressure gauge. Standard overhead gravity tanks deliver 0.5 to 1.5 Bar pressure, whereas thermostatic rain shower panels require 2.5 to 4.0 Bar. Low pressure indicates a need for dedicated booster pumps.
- Water Quality Audit: Test your home’s water supply for Total Dissolved Solids (TDS). High TDS (exceeding 600 PPM) demands Physical Vapor Deposition (PVD) anti-tarnish fittings and point-of-use inline softeners to prevent mineral calcification.
B. Structural & Subfloor Analysis
- Thermal Moisture Mapping: Use non-invasive infrared thermal cameras to scan adjacent bedroom and hallway walls for hidden dampness signatures or active capillary seepage.
- Slab Drop Inspection: Identify whether your bathroom uses a sunken concrete slab (12 to 18 inches drop) or a flat floor slab with raised brick platforms. This dictates whether waste lines can be concealed beneath the floor or require wall-routed plumbing.
2. Spatial Ergonomics & Layout Architecture
Bathroom planning relies heavily on spatial clearance. A room may feature luxury materials, but if a shower door strikes the vanity or there is insufficient legroom in front of the WC, the design fails.
+---------------------------------------------------------------------------------+
|                       MANDATORY ERGONOMIC CLEARANCES                            |
+-------------------+-------------------+-------------------+---------------------+
| WATER CLOSET (WC) | SHOWER ENCLOSURE  | VANITY STATION    | DOORWAY SWING       |
| Min 30" width;    | Min 30" x 30" area;| Min 30" width;    | Min 30" door width; |
| 21" front clearance| 36" x 36" ideal   | 18" depth         | 90° clear swing path|
+-------------------+-------------------+-------------------+---------------------+
The Three Functional Layout Models
Layout 1: The Linear Compact Layout (For 30 to 45 sq. ft. Bathrooms)
Ideal for apartment guest washrooms and compact city flats. All primary fixtures—the vanity basin, wall-hung WC, and shower zone—are arranged along a single plumbing wall. This minimizes wall-chasing costs and optimizes narrow footprints.
Layout 2: The Split Wet-and-Dry Layout (For 50 to 75 sq. ft. Bathrooms)
The standard configuration for modern master bathrooms. The room is divided into two distinct halves:
- The Dry Zone: Housing the vanity cabinet, backlit mirror, and wall-hung toilet.
- The Wet Zone: A dedicated shower area separated by a frameless toughened glass partition or sliding door to contain water spray.
Layout 3: The Four-Fixture Master Spa Suite (For 80+ sq. ft. Bathrooms)
An expansive luxury layout featuring four distinct functional zones: a double-basin floating vanity, an enclosed toilet room with an automated smart bidet, a walk-in steam shower enclosure with ceiling rain panels, and a freestanding soaking tub set against an accent wall.
3. The 7-Layer Leak-Proof Waterproofing Protocol
The single most critical technical phase in any bathroom renovation is waterproofing. Water seepage through subfloor slabs ruins adjacent living room walls, destroys custom vanity woodwork, and leads to expensive disputes over lower-floor ceiling damage.
                 WATERPROOFING & FLOOR SLAB STRUCTURE
+----------------------------------------------------------------------+
|  [Layer 7] Anti-Skid Vitrified / Porcelain Floor Tile (R10/R11)      |
+----------------------------------------------------------------------+
|  [Layer 6] High-Flex Polymer-Modified Waterproof Tile Adhesive       |
+----------------------------------------------------------------------+
|  [Layer 5] Sloped Cementitious Screed Base (1:100 Gradient to Drain) |
+----------------------------------------------------------------------+
|  [Layer 4] Second Elastomeric Sealing Coat (Cross-Directional)       |
+----------------------------------------------------------------------+
|  [Layer 3] Alkali-Resistant Glass Fiber Mesh Reinforcement          |
+----------------------------------------------------------------------+
|  [Layer 2] First Polymer-Modified Elastomeric Slurry Coat            |
+----------------------------------------------------------------------+
|  [Layer 1] Reinforced Concrete Base Slab (RCC) + Mortar Corner Coves |
+----------------------------------------------------------------------+
Detailed Layer Breakdown
- Sub-Slab Scarification: The bare concrete slab is scraped clean of loose debris, sand, and old mortar, with micro-fissures injected with non-shrink polymer grout.
- Polymer Corner Coves: Polymer-modified mortar coves (2×2 inches) are formed along all 90-degree floor-to-wall junctions to prevent stress cracking.
- First Elastomeric Coat: A thick slurry coat of two-component polymer-modified cementitious membrane is applied across the floor slab.
- Glass Fiber Mesh Reinforcement: Alkali-resistant glass fiber mesh (145 GSM) is embedded into the wet base coat along all corners, floor traps, and wall junctions.
- Second Elastomeric Coat: A cross-directional second coat is applied, extending 7 feet high up shower walls to seal against tile grout moisture penetration.
- Sloped Screed Base: Screed concrete mixed with liquid waterproofing compound is laid at a precise 1:100 fall gradient toward floor drains.
- Mandatory 72-Hour Pond Test: The bathroom floor is flooded with 6 inches of standing water for 72 continuous hours. Site engineers verify zero drop in water level and confirm lower ceilings remain dry before tiling begins.
4. Modern Plumbing Architecture: CPVC Manifolds vs. PEX
Upgrading concealed water lines requires selecting modern polymer piping networks built to resist scaling, high pressure, and thermal expansion.
+---------------------------------------------------------------------------------------------------+
|                                 CPVC vs. PEX PIPING COMPARISON                                    |
+-----------------------+------------------------------------+--------------------------------------+
| Technical Parameter   | SDR-11 CPVC Plumbing Lines         | PEX Flexible Manifold System         |
+-----------------------+------------------------------------+--------------------------------------+
| Material Composition  | Chlorinated Polyvinyl Chloride     | Cross-linked Polyethylene            |
+-----------------------+------------------------------------+--------------------------------------+
| Jointing Method       | Solvent cement cold welding        | Mechanical expansion ring crimping   |
+-----------------------+------------------------------------+--------------------------------------+
| Flexibility           | Rigid straight lengths; uses elbows| Highly flexible; bends around corners|
+-----------------------+------------------------------------+--------------------------------------+
| Fitting Connections   | Multiple 90° elbows inside walls   | Continuous runs from central manifold|
+-----------------------+------------------------------------+--------------------------------------+
| Scale Resistance      | High (Smooth interior bore)        | Exceptional (Zero mineral adhesion)  |
+-----------------------+------------------------------------+--------------------------------------+
| Pressure Rating       | 28 Bar at 23°C / 8.6 Bar at 82°C   | 11 Bar at 23°C / 6.9 Bar at 93°C     |
+-----------------------+------------------------------------+--------------------------------------+
The Manifold Distribution Rule
Rather than installing a single supply trunk line that drops pressure whenever multiple taps open, modern bathroom plumbing utilizes a central manifold distribution loop. Dedicated 3/4-inch lines feed individual fixtures (shower, vanity basin, flushing tank) directly from a central isolation valve bank, ensuring consistent pressure and temperature.
5. Step-by-Step Execution Workflow & Schedule
Executing a bathroom renovation demands strict sequencing. Deviating from this order can damage newly installed utilities or compromise surface finishes.
1
1. Site Protection, Isolation & Controlled Demolition
Days 1–3
1.1. Site Protection, Isolation & Controlled Demolition:Days 1–3.
Work zones are isolated using zippered plastic barrier curtains. Access hallways are lined with protective floor runners. Technicians carefully chip away old wall tiles, floor mortar beds, rusted pipes, and obsolete fixtures down to bare structural concrete.
2
2. Structural Repairs & Subfloor Preparation
Days 4–6
2.2. Structural Repairs & Subfloor Preparation:Days 4–6.
Exposed concrete floor slabs are cleaned and scarified. Structural cracks are repaired using non-shrink polymer mortar, and mortar corner coves are created along floor-to-wall perimeters.
3
3. Concealed Plumbing Manifolds & Electrical Conduits
Days 7–9
3.3. Concealed Plumbing Manifolds & Electrical Conduits:Days 7–9.
Wall channels (wall chasing) are cut using dust-extracted diamond blades. SDR-11 CPVC or PEX supply lines, SWR PVC waste stacks, concealed thermostatic diverters, wall-hung WC steel mounting frames, and IP65 electrical conduits are installed.
4
4. 7-Layer Elastomeric Waterproofing & 72-Hour Pond Test
Days 10–12
4.4. 7-Layer Elastomeric Waterproofing & 72-Hour Pond Test:Days 10–12.
Dual coats of elastomeric polymer membrane are applied over floor slabs and extended 7 feet up shower walls, reinforced with fiberglass mesh. The basin is flooded with water for 72 hours to certify a leak-proof seal.
5
5. Screed Slope Engineering, Tiling & Epoxy Grouting
Days 13–16
5.5. Screed Slope Engineering, Tiling & Epoxy Grouting:Days 13–16.
Floor screed is laid at a 1:100 drainage slope. Large-format vitrified slabs or porcelain wall tiles are set using polymer-modified adhesives. Tile seams are sealed with stain-proof two-part resin epoxy grout.
6
6. False Ceiling, Custom Cabinetry & Glass Fitting
Days 17–19
6.6. False Ceiling, Custom Cabinetry & Glass Fitting:Days 17–19.
Moisture-resistant calcium silicate false ceilings are installed with warm LED cove lighting. Custom 100% waterproof WPC vanities with quartz tops and 8mm toughened glass shower partitions are precision-mounted.
7
7. Sanitaryware Fitment, Pressure Testing & Commissioning
Days 20–21
7.7. Sanitaryware Fitment, Pressure Testing & Commissioning:Days 20–21.
Branded CP faucets, wall-hung WCs, and rain shower heads are mounted. The plumbing system undergoes a 5-bar pressure test. The room is deep-cleaned and handed over for immediate use.
6. Financial Budget Planning & Itemized Allocation
A detailed financial budget keeps your renovation on track. The table below outlines a typical percentage budget distribution for a high-quality bathroom makeover:
+-------------------------------------------------------------------------------+
|                       BUDGET ALLOCATION PERCENTAGES                           |
+-----------------------------------+-------------------------------------------+
| Renovation Category               | Recommended Budget Share (%)              |
+-----------------------------------+-------------------------------------------+
| Sanitaryware & Metallic Faucets   | 28% – 32%                                 |
| Wall & Floor Cladding (Tiles/Slabs)| 20% – 24%                                 |
| Civil Labor, Demolition & Masonry | 16% – 18%                                 |
| Concealed Plumbing & Electricals  | 12% – 14%                                 |
| Custom Vanity & Glass Partition   | 10% – 12%                                 |
| Waterproofing & Chemical Testing  | 5% – 6%                                   |
| Contiguity Contingency Buffer     | 5%                                        |
+-----------------------------------+-------------------------------------------+
Financial Estimates Across Project Tiers (50 sq. ft. Footprint)
| Project Tier | Essential Budget Package | Premium Custom Package | Luxury Master Spa Suite |
|---|---|---|---|
| Typical Cost Range | ₹75,000 – ₹1,30,000 | ₹1,40,000 – ₹2,80,000 | ₹3,00,000 – ₹7,50,000+ |
| Demolition & Civil Prep | Basic fitting removal | Full tile & screed stripping | Structural masonry alterations |
| Plumbing Infrastructure | Localized CPVC repairs | Full CPVC/SWR re-piping | Flexible PEX manifold system |
| Waterproofing Protection | Single-coat slurry coat | 2-Pass elastomeric + flood test | Multi-layer hybrid membrane |
| Tile Cladding Selection | Vitrified 2×2 ft tiles | Vitrified GVT 4×2 ft slabs | Imported Italian marble / Slabs |
| Sanitaryware & Faucets | Jaquar / Cera / Hindware | Kohler / Grohe / Toto | Hansgrohe / Axor / Smart WC |
| Glass Partitioning | Fixed 8mm toughened panel | Frameless 8mm glass enclosure | 10mm Fluted / Tinted glass |
| Vanity & Cabinetry | Prefabricated WPC unit | Custom BWP plywood + Quartz | Fluted teak veneer + Smart mirror |
7. Essential Material Selection Matrix
Selecting materials certified for high-moisture environments is vital for longevity.
+---------------------------------------------------------------------------------------------------+
|                                 HIGH-PERFORMANCE MATERIAL PALETTE                                 |
+-----------------------+------------------------------------+--------------------------------------+
| Component Category    | Ideal Material Specification       | Avoid These Materials                |
+-----------------------+------------------------------------+--------------------------------------+
| Vanity Core Board     | 100% Waterproof WPC / BWP 710 Ply  | Commercial MDF, Particle Board, HDMR |
+-----------------------+------------------------------------+--------------------------------------+
| Countertop Surfaces   | Engineered Quartz, Sintered Stone  | Natural Porous Marble (Unsealed)     |
+-----------------------+------------------------------------+--------------------------------------+
| Metallic Faucet Finish| PVD (Brushed Gold, Gunmetal)       | Standard Electroplated Chrome        |
+-----------------------+------------------------------------+--------------------------------------+
| Tile Joint Grouting   | Two-Part Resin Epoxy Grout         | Traditional White Cement Grout       |
+-----------------------+------------------------------------+--------------------------------------+
| Shower Glass Panels   | 8mm/10mm Toughened Safety Glass    | Annealed Glass, Acrylic Sheets       |
+-----------------------+------------------------------------+--------------------------------------+
| False Ceiling Grid    | Calcium Silicate / Moisture Board  | Standard Commercial Gypsum Board     |
+-----------------------+------------------------------------+--------------------------------------+
8. Frequently Asked Questions (15 FAQs)
Q1: What is the first step in planning a bathroom renovation?
Answer: The first step is conducting a thorough site audit. This includes inspecting existing concealed plumbing lines, testing subfloor dampness, checking drain stack slope, and mapping electrical conduit routes before finalizing budgets or aesthetics.
Q2: How much does a complete bathroom renovation cost on average?
Answer: A comprehensive bathroom renovation ranges from ₹75,000 to ₹1,30,000 for standard budget upgrades, ₹1,40,000 to ₹2,80,000 for mid-range premium transformations, and ₹3,00,000 to ₹7,50,000+ for luxury master suites with imported marble, digital thermostatic valves, and custom vanities.
Q3: How long does a bathroom renovation take from start to finish?
Answer: A standard 40 to 60 sq. ft. bathroom renovation takes between 14 to 21 working days on-site. This accounts for civil stripping, concealed plumbing updates, a mandatory 72-hour waterproofing pond test, laser-level tiling, custom vanity fitting, and final commissioning.
Q4: Why is a 7-layer waterproofing system mandatory during bathroom remodeling?
Answer: A 7-layer elastomeric polymer-modified cementitious system creates a seamless chemical barrier over the concrete base slab and walls. It prevents water from soaking into subfloor mortar beds, eliminating lateral wall dampness, paint peeling, and inter-floor ceiling leaks.
Q5: Can I renovate my bathroom without moving out of the house?
Answer: Yes. In homes with multiple bathrooms, contractors work systematically on one room at a time. Work zones are isolated using floor-to-ceiling zippered plastic dust barriers, hallways are lined with protective runners, and main water feeds remain functional.
Q6: What materials are best for bathroom vanities to prevent water damage?
Answer: We recommend 100% waterproof WPC (Wood Polymer Composite) boards or BWP Grade 710 marine plywood paired with quartz or granite countertops. Commercial particle board and MDF should be avoided as they absorb moisture and swell over time.
Q7: How do you choose between CPVC and PEX piping for concealed water lines?
Answer: SDR-11 CPVC is rigid, cost-effective, highly durable, and ideal for straightforward runs. PEX (Cross-linked Polyethylene) is flexible, requires fewer elbow fittings, resists scaling, and is ideal for continuous manifold distribution systems.
Q8: How do I prevent hard water scaling on my new bathroom taps and tiles?
Answer: Install point-of-use inline water softeners, specify Physical Vapor Deposition (PVD) coated faucets in brushed gold or gunmetal, apply hydrophobic nano-coatings on glass cubicles, and seal tile joints with stain-resistant epoxy grout.
Q9: What tile sizes make a compact bathroom look larger?
Answer: Large-format vitrified tiles or porcelain slabs measuring 4×2 feet, 6×4 feet, or floor-to-ceiling 8×4 feet minimize grout lines, creating a continuous visual surface that expands the feeling of space.
Q10: How do I convert an old squatting pan toilet to a modern wall-hung WC?
Answer: The raised brick platform is demolished, soil drain stack angles are re-engineered using 110mm SWR PVC with 45-degree swept bends, an in-wall concealed steel cistern frame is anchored, the floor slab is screeded and waterproofed, and the wall-hung bowl is mounted.
Q11: What is the correct floor slope gradient for efficient bathroom drainage?
Answer: A slope gradient of 1:100 (a 1 cm drop for every 100 cm of distance toward the drain) is standard. This ensures swift water runoff into point or trench drains without causing pooling or instability while walking.
Q12: How can I improve low shower water pressure during renovation?
Answer: Replace scale-choked 1/2-inch GI lines with 1-inch or 3/4-inch CPVC/PEX manifold loops, eliminate sharp 90-degree elbows, and install an inline automatic pressure booster pump calibrated to 3.0–4.0 Bar.
Q13: What is the difference between cement grout and epoxy grout?
Answer: Cement grout is porous and absorbs water, soap scum, and hard water minerals over time. Two-part resin epoxy grout is 100% non-porous, waterproof, stain-resistant, and easily washable.
Q14: Do I need 3D designs before starting civil work?
Answer: Yes. 3D renderings and 2D CAD technical schematics prevent costly layout mistakes, confirm spatial clearances, map out tile patterns, and allow you to visualize lighting and fixture finishes before demolition begins.
Q15: What warranties should I expect from a professional renovation contractor?
Answer: Expect a written 10-year anti-leakage warranty on structural waterproofing, a 10-year warranty against water swelling on custom WPC cabinetry, a 2-year service warranty on plumbing execution, and original manufacturer warranties on fittings.
9. Handover Quality Verification Checklist
Before issuing final payment to your renovation contractor, review this comprehensive quality handover checklist:
+-------------------------------------------------------------------------------+
|                       RENOVATION HANDOVER CHECKLIST                           |
+-------------------------------------------------------------------------------+
| [ ] 72-Hour Water Ponding Test verified with zero drop in water level.        |
| [ ] Floor screed sloped at 1:100 fall ratio with no standing water pools.     |
| [ ] Concealed CPVC/PEX supply lines pressure-tested at 5 Bar for 24 hours.    |
| [ ] All tile joints sealed using non-porous two-part resin epoxy grout.       |
| [ ] Wall-hung WC frame anchored securely with zero deflection under weight.   |
| [ ] Custom vanities built with 100% waterproof WPC or BWP Grade 710 marine ply.|
| [ ] Thermostatic shower diverters calibrated to balanced temperature output.  |
| [ ] IP65 electrical circuits and exhaust ventilation tested for safety.       |
+-------------------------------------------------------------------------------+
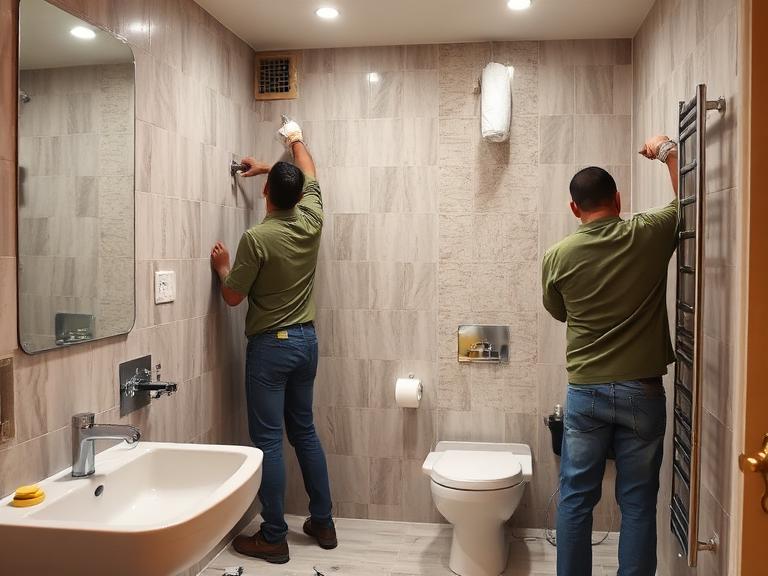
10. Conclusion
A successful bathroom renovation requires balancing aesthetic design with sound civil engineering. By following this step-by-step planning guide—conducting a pre-renovation audit, prioritizing ergonomic clearances, executing a 7-layer waterproofing protocol, upgrading plumbing manifolds, and enforcing quality checks—you ensure your new bathroom provides lasting comfort, safety, and architectural value for decades to come.